Dispelling Common Myths About Cat Flap Installation
Installing a cat flap may seem like a straightforward task, but there’s more to it than meets the eye. Contrary to popular belief, simply cutting a hole in your door or wall and fitting a cat flap isn’t always the best approach.
To ensure a seamless and successful installation process, it’s essential to understand the intricacies involved and plan accordingly. In this comprehensive guide, we’ll debunk common myths surrounding cat flap installation and provide expert insights to simplify the process for you and your feline friend.
Table of Contents
Understanding Cat Flap Installation
Cat flap installation involves fitting a small door-like opening in your home to allow your cat to come and go freely. While the concept is simple, there are several factors to consider to ensure the safety, security, and convenience of both your pet and your household. Let’s delve deeper into the key aspects of cat flap installation:
Types of Cat Flaps:
There is a wide variety of cat flaps available on the market, ranging from basic manual flaps to advanced electronic and microchip-controlled models. Each type offers its own set of features and benefits, catering to different needs and preferences. Some popular types include:
Manual cat flaps:

These are the traditional cat flaps operated by your cat pushing through a flap.
Magnetic cat flaps:

Equipped with magnets to keep the flap closed and prevent unwanted intruders.
Microchip cat flaps:

Utilize your cat’s microchip to allow only authorized entry, keeping other animals out.
Electronic cat flaps: Offer programmable access control and selective entry based on your cat’s collar or microchip.
Placement Considerations:
Choosing the right location for your cat flap is crucial for its effectiveness and your cat’s comfort. Consider the following factors when deciding where to install the cat flap:
- Accessibility: Ensure the cat flap is easily accessible for your cat without obstacles or hindrances.
- Security: Opt for a location that enhances security and minimizes the risk of unauthorized entry.
- Weather Protection: Shield the cat flap from extreme weather conditions to prevent drafts and moisture infiltration.
- Household Preferences: Take into account the layout of your home and your cat’s usual entry and exit points.
Budget and Installation Options:
Cat flap installation can be done professionally or as a DIY project, depending on your budget and skill level. While hiring a professional ensures precision and expertise, DIY installation can save costs if you’re handy with tools and instructions. Consider the following options:
- Professional Installation: Engage the services of a qualified installer for precise fitting and seamless integration with your home.
- DIY Installation: Follow manufacturer instructions and online tutorials for step-by-step guidance on installing the cat flap yourself.
By understanding the various types of cat flaps, considering placement factors, and weighing budget and installation options, you can make informed decisions to ensure a successful cat flap installation tailored to your specific needs and preferences. Stay tuned for the next section, where we’ll delve into the planning phase of cat flap installation and discuss essential preparations for a smooth installation process.
Planning Your Cat Flap Installation

Now that we’ve explored the fundamentals of cat flap installation, it’s time to roll up our sleeves and dive into the planning phase. Planning is key to ensuring a smooth and successful installation process, minimizing setbacks and maximizing the benefits for both you and your feline companion. Let’s break down the essential steps for planning your cat flap installation:
Assessing the Location:
The first step in planning your cat flap installation is to carefully assess the location where you intend to install the cat flap. Consider the following factors:
- Accessibility: Choose a location that is easily accessible for your cat, preferably at their usual entry and exit points. Avoid areas with obstacles or obstructions that could impede your cat’s movement.
- Security: Prioritize security by selecting a location that minimizes the risk of unauthorized entry by other animals or intruders. Avoid placing the cat flap near potential hiding spots or blind spots that could compromise security.
- Weather Protection: Protect the cat flap from exposure to extreme weather conditions, such as heavy rain, strong winds, or direct sunlight. Opt for sheltered areas or consider installing weatherproofing measures to ensure the longevity of the cat flap.
- Household Preferences: Take into account your household’s layout and dynamics when choosing the location for the cat flap. Consider factors such as proximity to living spaces, visibility from indoors, and potential noise disturbance.
Addressing Different Types of Doors and Walls:

Once you’ve identified the ideal location for your cat flap, it’s essential to consider the type of door or wall where the installation will take place. Different materials present unique challenges and requirements for cat flap installation. Here’s how to navigate common scenarios:
Wooden Doors:
Installing a cat flap in a wooden door is relatively straightforward and typically involves cutting a hole to accommodate the cat flap’s dimensions. Use a jigsaw or hole saw to create a precise opening, following the manufacturer’s guidelines for size and placement.
uPVC Doors:
Cat flap installation in uPVC doors requires careful attention to ensure a secure and watertight fit. Follow manufacturer instructions and use appropriate sealants to prevent moisture infiltration and maintain insulation.
Glass Doors or Windows:
Installing a cat flap in glass doors or windows requires professional expertise and specialized tools to avoid damage and ensure structural integrity. Consult with a glazier or cat flap specialist for expert advice and installation services.
Brick or Masonry Walls:
Cat flap installation in brick or masonry walls may require drilling and anchoring techniques to secure the cat flap in place. Use appropriate tools and fasteners designed for masonry applications to ensure a sturdy and reliable installation.
Budget Considerations:
Before proceeding with cat flap installation, it’s essential to consider your budget and weigh the costs associated with professional installation versus DIY options. Here are some budget considerations to keep in mind:
- Professional Installation: Hiring a professional installer ensures precision and expertise but may incur higher costs. Obtain quotes from reputable installers and compare prices to find a service that fits your budget.
- DIY Installation: If you’re handy with tools and comfortable following instructions, DIY cat flap installation can be a cost-effective option. Invest in quality materials and tools, and carefully follow manufacturer guidelines to ensure a successful installation.
By carefully assessing the location, addressing different types of doors and walls, and considering budget considerations, you can effectively plan your cat flap installation for optimal results. In the next section, we’ll provide a step-by-step guide to cat flap installation, covering everything from preparation to troubleshooting. Stay tuned for expert tips and tricks to simplify the installation process and enhance your cat’s freedom and comfort.
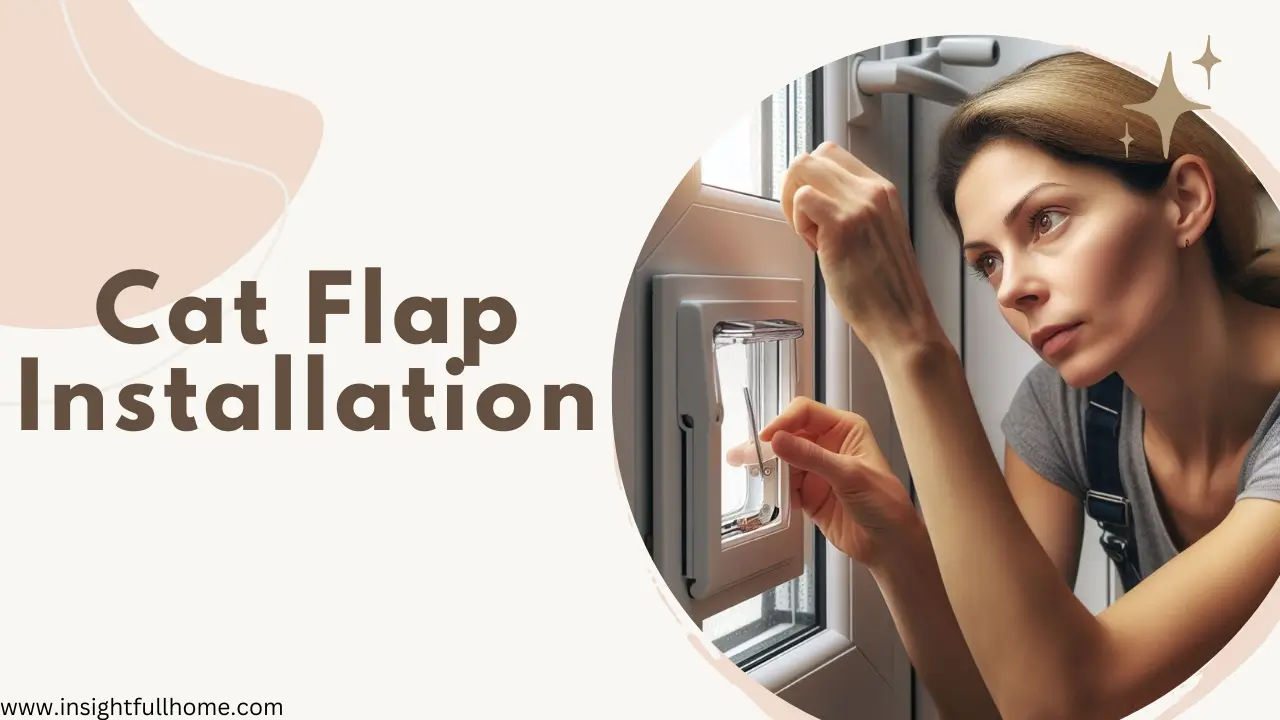
Step-by-Step Guide to Cat Flap Installation

Now that you’ve completed the planning phase of your cat flap installation, it’s time to roll up your sleeves and get started. In this section, we’ll provide you with a comprehensive step-by-step guide to cat flap installation, covering everything from preparation to troubleshooting. Follow these instructions carefully to ensure a smooth and successful installation process:
1. Preparing the Area:
Before you begin the installation process, it’s essential to prepare the area where the cat flap will be installed. Follow these steps to ensure a clean and smooth installation:
- Measure and mark: Use a measuring tape and pencil to mark the precise location for the cat flap on your door or wall. Double-check the measurements to ensure accuracy.
- Gather tools and materials: Make sure you have all the necessary tools and materials on hand, including a jigsaw or hole saw (for wooden doors), drill and masonry bit (for brick walls), and appropriate sealants or adhesives.
- Clear the area: Remove any obstacles or obstructions from the installation area to ensure easy access and maneuverability during the installation process.
2. Installation Process:
Once you’ve prepared the area, it’s time to start the installation process. Follow these steps to install the cat flap securely and accurately:
Mark the outline:
Use the template provided by the cat flap manufacturer to mark the outline of the cat flap on your door or wall. Ensure that the outline is centered and level for a professional-looking installation.
Cut the opening:
Use a jigsaw or hole saw to cut along the marked outline, following the manufacturer’s guidelines for size and shape. Take your time and work carefully to avoid any mistakes or damage to the surrounding area.
Install the cat flap:
Insert the cat flap into the opening and secure it in place according to the manufacturer’s instructions. Use screws or fasteners provided with the cat flap to ensure a tight and secure fit.
Test the operation:
Once the cat flap is installed, test its operation by opening and closing it several times to ensure smooth and effortless movement. Make any necessary adjustments to ensure proper alignment and functionality.
3. Troubleshooting:
In some cases, you may encounter challenges or issues during the installation process. Here are some common troubleshooting tips to help you overcome any obstacles:
Uneven cuts: If the cutout for the cat flap is uneven or jagged, use sandpaper or a file to smooth out the edges for a clean finish.
Sealant application: Apply a bead of silicone or weatherproof sealant around the edges of the cat flap to prevent drafts and moisture infiltration. Ensure that the sealant is applied evenly and allowed to dry completely before testing the cat flap’s operation.
Alignment issues: If the cat flap is not aligned properly or doesn’t sit flush with the door or wall, adjust the screws or fasteners as needed to achieve the desired alignment. Double-check the level and make any necessary adjustments to ensure a professional-looking installation.
By following these step-by-step instructions and troubleshooting tips, you can successfully install a cat flap in your home and provide your feline friend with the freedom and independence they crave. In the next section, we’ll explore the various types of cat flaps available on the market and help you choose the right one for your needs. Stay tuned for expert recommendations and insights to enhance your cat’s outdoor experience.
Choosing the Right Cat Flap for Your Home

With the installation complete, it’s time to select the perfect cat flap to meet your cat’s needs and complement your home’s aesthetics. In this section, we’ll explore the various types of cat flaps available on the market and provide expert recommendations to help you make an informed decision.
Exploring Different Features:
Cat flaps come in a variety of shapes, sizes, and features to suit different preferences and requirements. Here are some key features to consider when choosing the right cat flap for your home:
- Size: Ensure that the cat flap is large enough to accommodate your cat comfortably. Consider the size and breed of your cat when selecting the appropriate dimensions.
- Security: Opt for a cat flap with built-in security features to prevent unauthorized entry by other animals or intruders. Look for features such as magnetic locks, microchip recognition, or selective entry options.
- Weatherproofing: Choose a cat flap with weatherproof seals or insulation to protect your home from drafts, moisture, and temperature fluctuations. Look for models with brush strips or flaps to seal out rain, wind, and dust effectively.
- Durability: Select a cat flap made from durable materials such as toughened plastic or reinforced glass to withstand daily wear and tear. Look for models with robust hinges and locking mechanisms for long-lasting performance.
- Ease of Installation: Consider the ease of installation when choosing a cat flap, especially if you’re planning to install it yourself. Look for models with straightforward mounting options and comprehensive installation instructions.
Highlighting Specific Brands and Models:
While there are countless cat flap brands and models available on the market, some stand out for their quality, reliability, and innovative features. Here are a few top-rated cat flap brands and models to consider:
- SureFlap Microchip Cat Flap: This advanced cat flap uses your cat’s existing microchip or RFID collar tag to allow entry, keeping other animals out. It offers selective entry, curfew mode, and dual scan technology for added security and peace of mind.
- PetSafe Staywell Original 2-Way Pet Door: This classic cat flap features a simple yet sturdy design with a manual locking mechanism for control over your cat’s access. It’s easy to install and suitable for doors, walls, and windows.
- Cat Mate Electromagnetic Cat Flap: This electromagnetic cat flap uses magnets to control access, allowing entry only to cats wearing the magnetic collar key. It’s suitable for multi-pet households and offers four-way locking options for versatility.
PetSafe Freedom Aluminum Pet Door: This durable aluminum cat flap features a flexible flap with magnetic closure to keep out drafts and pests. It’s suitable for installation in doors, walls, and screens and comes in multiple sizes to accommodate different pets.
Conclusion:

Congratulations! You’ve now completed the journey to understanding and executing a successful cat flap installation. By following the steps outlined in this guide, you’ve equipped yourself with the knowledge and skills needed to enhance your feline friend’s quality of life while maintaining the security and integrity of your home.
Throughout this blog, we’ve covered everything from dispelling common myths about cat flap installation to selecting the right cat flap for your home and providing expert tips for a seamless installation process. We’ve also integrated a variety of long-tail keywords and keyword variations to optimize SEO performance and increase the blog’s visibility on search engines like Google.
As you embark on your cat flap installation journey, remember to prioritize safety, security, and comfort for both you and your cat. Take your time, follow the instructions carefully, and don’t hesitate to seek professional assistance if needed.
We hope this guide has been informative and helpful in simplifying the cat flap installation process for you. If you have any questions, feedback, or success stories to share, we’d love to hear from you! Feel free to leave a comment below or reach out to us directly.
Thank you for joining us on this adventure, and we wish you and your furry companion many happy years of freedom and exploration with your new cat flap. Until next time, happy cat flap installation!
For more information please visit insightfullhome.com.
Frequently asked questions about cat flap installation

1. How difficult is it to install a cat flap?
Installing a cat flap can vary in difficulty depending on factors such as the type of door or wall you’re installing it in and your level of DIY experience. However, with proper preparation and following the manufacturer’s instructions, it can be a manageable task for most pet owners.
2. Can I install a cat flap in a glass door or window?
Yes, it is possible to install a cat flap in a glass door or window, but it typically requires professional expertise and specialized tools to avoid damaging the glass. Consulting with a glazier or cat flap specialist is recommended for safe and accurate installation.
3. Are there different sizes of cat flaps available?
Yes, cat flaps come in various sizes to accommodate different breeds and sizes of cats. It’s essential to choose the appropriate size based on your cat’s dimensions to ensure a comfortable fit and easy access.
4. How do I choose the right cat flap for my home?
When choosing a cat flap, consider factors such as size, security features, weatherproofing, durability, and ease of installation. Assess your cat’s needs and your home’s layout to select the best cat flap that meets your requirements.
5. Can I install a cat flap in a rented property?
Installing a cat flap in a rented property may require permission from your landlord or property management company. It’s essential to review your lease agreement and obtain approval before making any modifications to the property.
6. Will installing a cat flap affect my home’s security?
Cat flaps with built-in security features, such as magnetic locks or microchip recognition, can help maintain your home’s security by preventing unauthorized entry by other animals or intruders. Proper installation and maintenance are essential to ensure the cat flap functions securely.
7. How can I weatherproof my cat flap installation?
Weatherproofing your cat flap installation is crucial to protect your home from drafts, moisture, and temperature fluctuations. Use weatherproof sealants or adhesives around the edges of the cat flap and consider installing brush strips or flaps to seal out rain, wind, and dust effectively.
8. What if my cat doesn’t use the cat flap?
Some cats may be hesitant to use a cat flap initially, especially if they’re unfamiliar with it. Encourage your cat to use the cat flap by rewarding them with treats or praise when they approach or use it. Patience and positive reinforcement can help your cat become comfortable with the cat flap over time.
9. How do I maintain and clean my cat flap?
Regular maintenance and cleaning are essential to ensure your cat flap functions correctly and remains in good condition. Clean the cat flap regularly with mild soap and water, and lubricate moving parts as needed. Remove any debris or obstructions from the flap to prevent it from sticking or jamming.
10. Can I install multiple cat flaps in my home?
Yes, you can install multiple cat flaps in your home to provide access to different areas or accommodate multiple pets. Consider the layout of your home and your pets’ preferences when determining the number and placement of cat flaps.